 Break out the lights, mix that potting soil and get those pepper seeds in the ground. It’s time to start gardening, becoming nearly a year-round career for The Root Sellers farm. Here are a couple of get growing videos from my YouTube channel -- https://www.youtube.com/watch?v=Z8tySO5oBoU&t=13s and my website videos at https://www.therootsellers.com/videos.html.
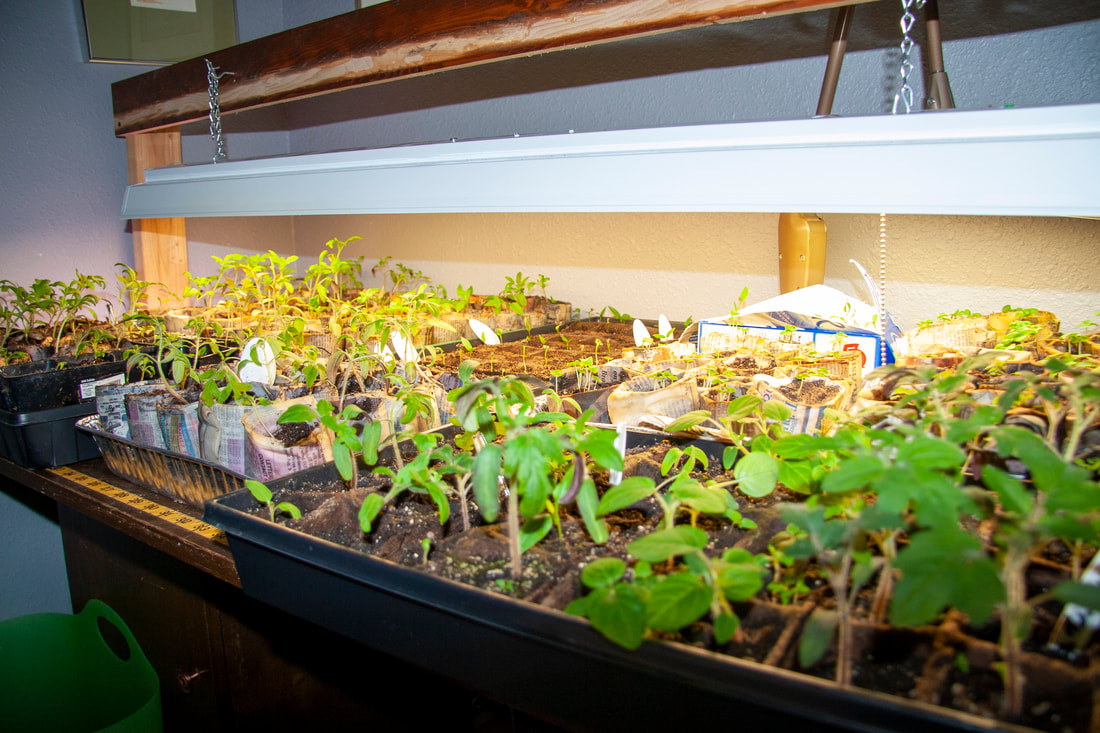
It’s not easy being green. Kermit the Frog has been fighting for green for many years now. It’s hard to imagine green on President’s Day as we are experiencing snow and cold, and I love it. Yep, if you are a gardener, you appreciate all moisture the area receives leading up to the big day – planting outdoors. However, if you have gardening friends, you will know by now they are chomping at the bit to get those seeds in some soil. And this is the week. How do I know? I keep a garden diary. It isn’t a complete record of what I do in the garden because work begins in earnest once we move to the outdoors. In the meantime, on Monday, I dashed out to the greenhouse to load up some small trays, plugged in my heat mat and dug out all the lights from storage in the basement. It’s essential to know a few things about getting those seedlings off to a good start. First, you need sterile soil, trays, water and seeds – and a notebook. I use a Rite in Rain mechanical pencil and notebook. When I was in biology in high school, Mr. Dinkins told us to keep our notebooks in pencil because if we ever dropped a book in the water or wet grass, it won’t run like a ballpoint pen. So, I have been doing that for years. Always record dates, temp, weather and whether you liked the fruit from those seeds in the prior harvest year. It helps to create a drawing of your garden and note where you planted crops for rotation purposes. We can talk about that later. Last year, we planted some heirloom tomatoes that ended up being the tiniest tomatoes ever. My spouse and I agreed they were a waste of our time, and we did not harvest more than a handful. Too bad we may not have pulled out the plants in time to prevent them from germinating in the high tunnel this season. Opps. Next, you need STERILE potting soil. If you do not choose the correct soil, your plants will experience damping-off and other diseases. I mix my own. Use sterile soil – but do not use anything that has those water retention beads and fertilizer in – this is very important. Sometimes that soil is the least expensive brand. Seeds are God’s perfect packages. They have everything they need to get going in this world, including the will to live. Mix a bucket in these parts – one-half soil, one-quarter vermiculite and one-quarter peat moss. This recipe is ideal for starting all your plants and potted flowers later in the summer. Fill your little pots. If you aren’t seeding 100 peppers, you can use a milk jug, pop bottle, whatever WATER-proof container you have, remembering that overwatering is a sin. It’s something that new gardeners often do. WARM up the containers and the soil in the sunshine on a windowsill and then plant those seeds. Cover your container with plastic wrap creating a mini greenhouse to keep them moist until they pop out of the ground. Then you wait. It takes a long time for peppers to germinate, so keep an eye on the moisture in the container. You don’t want it to be sopping wet, and you don’t want it to dry out completely. If possible, it’s important to have drainage holes in the bottom of the container. But you want to put a tray underneath that to catch the drips. Here’s a slight hint – if you take a coffee filter and put it over the holes in the bottom of a planter or container, the water will filter out, and the soil will stay in the pot. Tiny seedlings are tender so keep these final thoughts in mind. 1. Don’t overwater. 2. Use a spray bottle to avoid washing those new plants out of the soil. 3. Do not fertilize until much later. 4. When transplanting to a larger pot, do not handle the stem, move them using the leaves and don’t transplant until plants have at least four leaves. 5. Keep those containers in a warm space, but do not put them in your oven and forget to remove them before using the oven. Yes, the oven light provides ample heat for germination. 6. LIGHT THEM UP. A common mistake is not having enough light for those young seedlings to get a good start in the world. Use one cool and one warm fluorescent light instead of investing in an expensive grow light. You can get those fixtures for $20 or less at Menards. 7. Have fun. Gardeners are supposed to be the healthiest people on the planet. And, the rewards are good local food from your backyard. PS: if you haven’t ordered seed yet, you can check out my favorite LOCAL seed house at www.prairieroadorganic.co. The Podall family breeds seed that thrives in our zone leading to a great first-time experience in the garden. There is online ordering and fast shipping, so you still have plenty of time. So get growing.
0 Comments
Spring is right around the corner, I believe about seven days until the vernal equinox. The first time I heard that word, I decided to write a story. Of course, that was long time ago, the story is long gone, but I never forget the sound of those words.
Being a spring baby, I love spring. Being a gardener, I love spring. Being a bird watcher, I love spring. I just love spring. It's a time of new growth, awakenings and the scent of soil waking up. And, while I am praying for not-so-much rain, I do love that smell. On Thursday, March 12's Main Street Eats, we will talk a bit about seed starting. It's time. If you have the inclination to roll your own pots, here is a video that will show you how. It's a fun project for the children in your life, and a great recycling lesson also. Here are another few tips to get those transplants off to a good start.
Happy planting. If you have any questions, please feel free to ask questions using the comments section below. It's never too early to begin planning your garden. Instead of bemoaning the cold and snow, start thinking spring. Here is a short video of hints and tips for transplants and seeds using some common household items. I have already placed and received two orders of seeds. I might have enough but without a doubt there's more to be found with all the seed catalogs that continue to come in the mail. Have a question about your garden. Ask away. I would be happy to help. 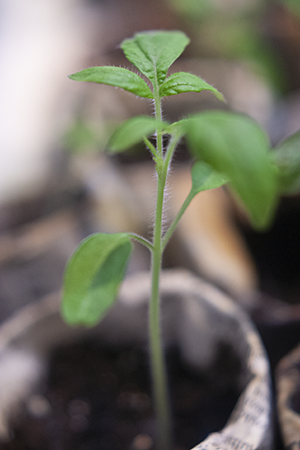 Planting seedlings in rolled paper pots is a successful way to recycle, add compost-able matter to your garden and save a little money on plastic pots. Planting seedlings in rolled paper pots is a successful way to recycle, add compost-able matter to your garden and save a little money on plastic pots. Sounds ominous... but it's not.
It's coming on time to be planting our little seedlings. You will find many voices of advice out there on social media. Yes, voices of reason, but also all those "hacks" you see to make your gardening more simple. Well, here's what I think. HAHAHAHAHAHAHAHaaaaaa. My spouse spends more time on Facebook than I do and so he sends me things like recipes and hints and tips to make my life easier. We all do it in February or March whether full bore hundreds of seeds or just a windowsill garden. Some of the hacks for seedlings include egg cartons, egg shells, paper pots, etc. etc. His latest post was about planting seeds in ice cream cones. Oh, yes... they are inexpensive, but with all the rest of those crazy ideas, they are never quite thought through. Imagine this. An ice cream cone poses several problems. It won't stand up on its own What happens when a cone gets wet? Even only melted ice cream will create a huge mess, and you will never be able to get those cones out of the tray and into your garden in one piece. So take this little tidbit of advice and watch the video on "pot rolling" on the home page of this website. And, stay tuned for more planting advice and photos as winter slips into spring - "Yippee the season of gardens." Got questions, please don't hesitate to comment on this post, I will respond as soon as possible. |
Sue B. Balcom
Writing, or maybe talking, comes naturally to me and under the guidance of a great newspaper editor I have acquired skills that led me to author four books. Archives
January 2023
Categories |
 RSS Feed